Flowers Continue Blooming in My Yard

Flowers brighten any spot, whether they’re planted or arranged in a vase. Not only do they provide beauty, but they also provide nourishment. I have witnessed several insects and hummingbirds enjoying nectar. Flowers also add property value! Perennials planted around a house can make a difference in appearance for the better. So, flowers aren’t just some kind of frivolous hobby. Mine continue to bloom prettily.

Plum Gladiolus Flowers

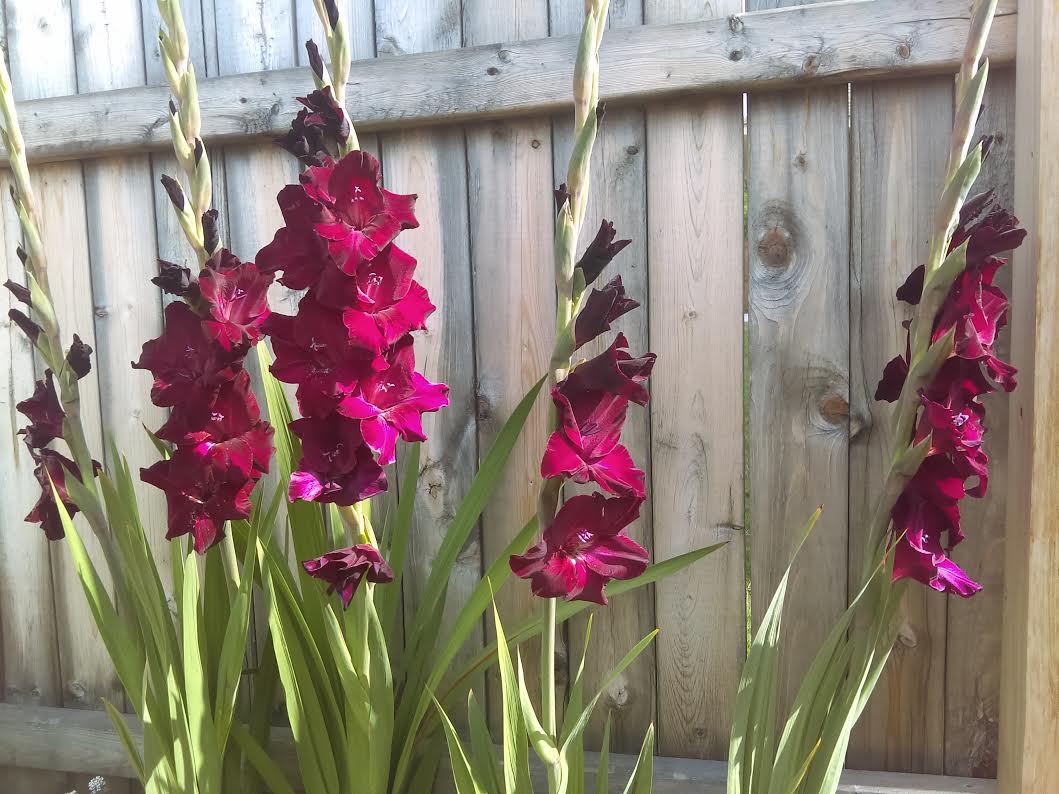
My plum-colored gladiolus did very well this year. Some of them put up two spikes of blooms! It’s a little strange since I only fertilized them twice, but I think they are liking the soil and their positioning.

FlowersFlowersFlowersFlowersFlowersFlowers

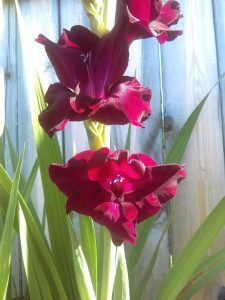
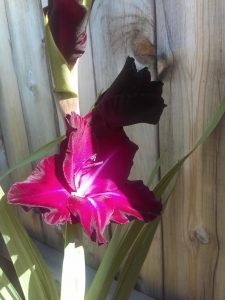
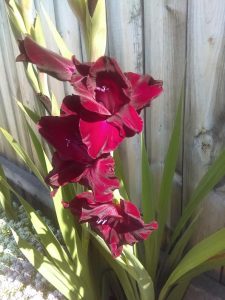
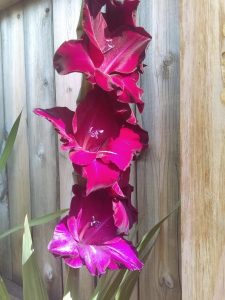
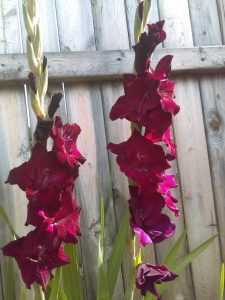
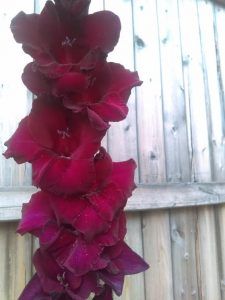
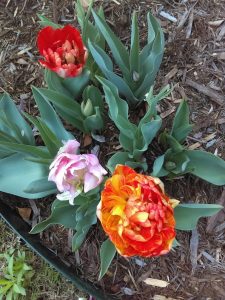
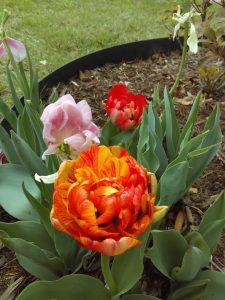
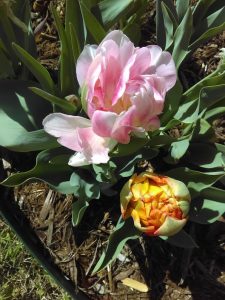
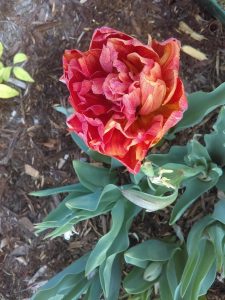
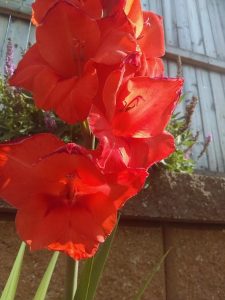
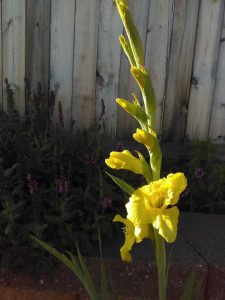
Perhaps I got a bit carried  away picture-taking, but I do love capturing blooms. Something about the colors and the shapes just make me happy. So, I hope that feeling transfers to viewers. Also, the plum gladiolus is one of my favorite varieties, so I couldn’t resist. Here are a few more colors to enjoy.

Flowers

FlowersFlowersFlowers

FlowersFlowers

FlowersFlowers

Flowers

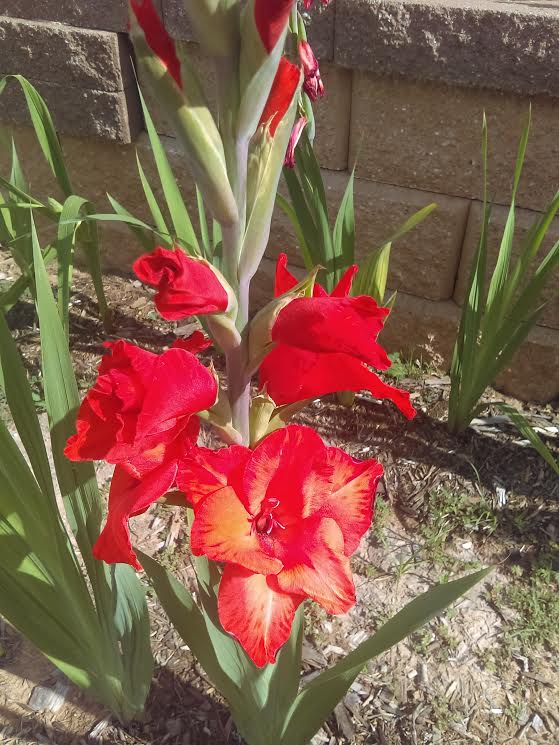
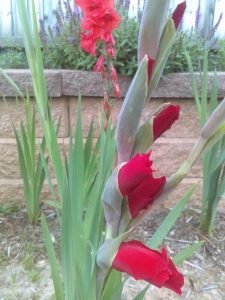
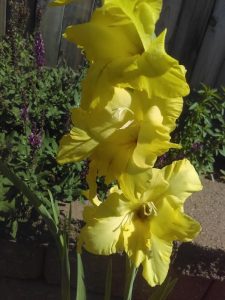
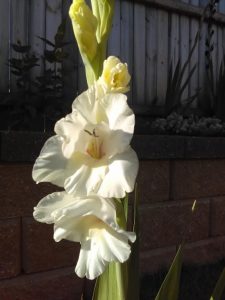
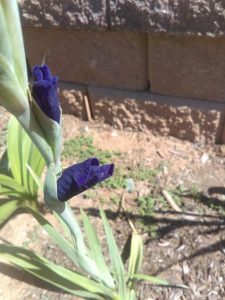
Gladiolus are definitely show-stoppers when it comes to beauty. Sadly, they only bloom once in the year. However, planting them every few weeks in the beginning of summer should give blooms all season long. I can’t wait to see the true color of the mystery glad. It looks like it’s going to be purple!

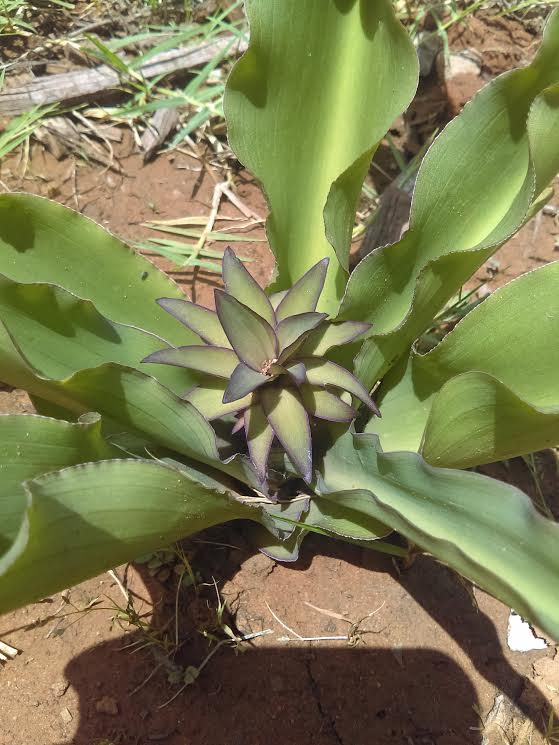
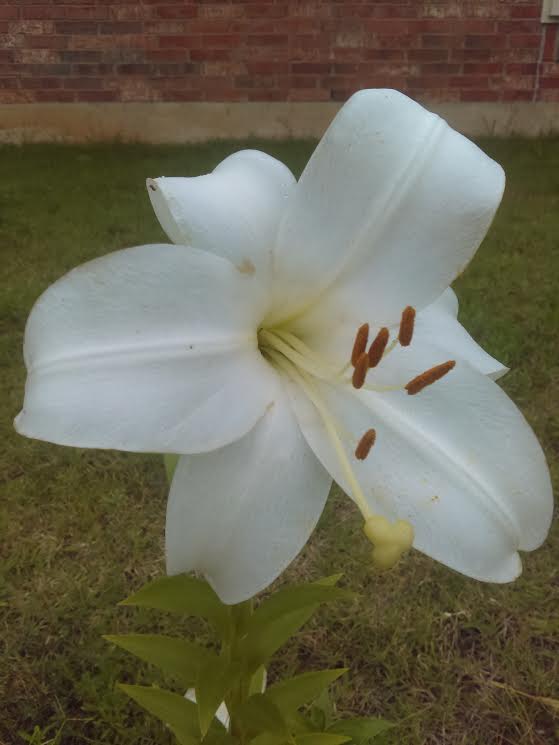
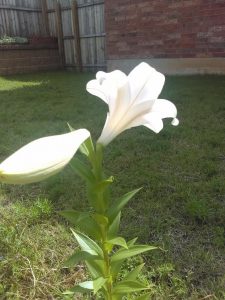
There are other beauties still blooming and some about to bloom. One that is pretty neat is pineapple lily. Last year, I purchased the bulbs because they looked exotic. They didn’t bloom at all. Finally, one of them is sending a bloom shoot up into the air. A garden lily also bloomed nicely for me, sprouting two buds instead of one.

FlowersFlowersFlowers

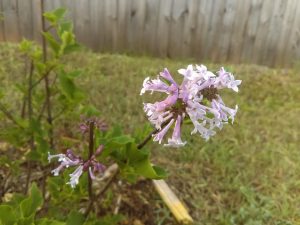
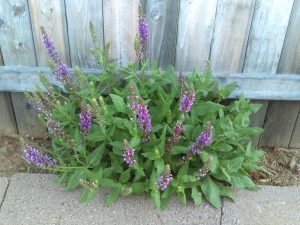
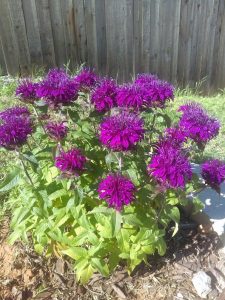
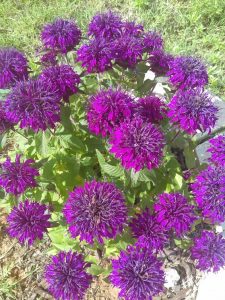
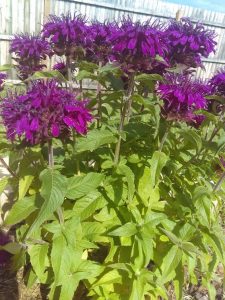
Another bright spot contains bee balm. It’s still going strong after blooming for two weeks! Many bees and hummingbirds have frequented the trumpet-like flowers for nectar. It’s always fun to see hummers perched above the bee balm on the fence. Sadly, it’s difficult to catch them with my camera. Maybe some time it will work.

Bee Balm FlowersBee Balm FlowersBee Balm Flowers

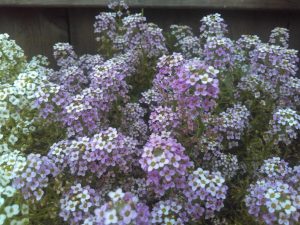
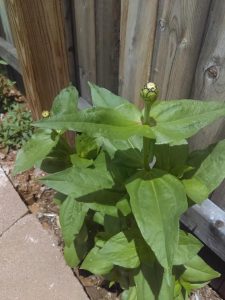
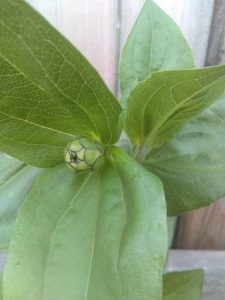
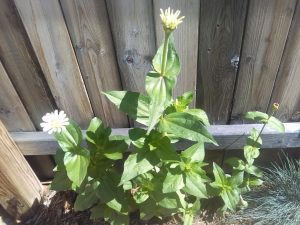
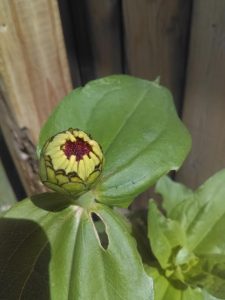
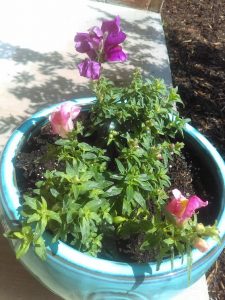
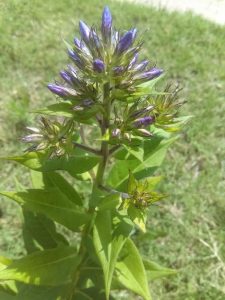
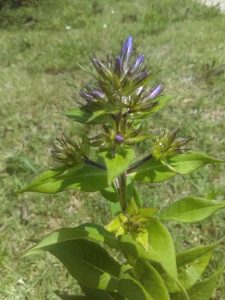
Here are some more pictures just for pure enjoyment. The alyssum will keep blooming throughout the summer until the first frost. All five of my zinnias are alive, but four are extremely healthy. As you can see, they are bursting with buds. Snapdragons brighten my front porch with their adorable flowers. The last two pictures are of Garden Phlox. While there are many phlox varieties to choose from, Garden Phlox is my favorite because of its scent and its tendency to naturalize.

FlowersFlowersFlowers


FlowersFlowersFlowers

FlowersFlowers

Pretty Crocheted Tulips That Never Fade

Tulips

When I began looking for floral patterns for my spring purse, I came across a beautiful one for tulips. It’s one composed only of symbols, but it is straightforward. Handmade-Paradise.ru is where I found it. The website is in Russian, but navigable because of the universal language of crochet. These tulips are especially tiny because of the thread and hook used. It takes quite some patience and an eye for detail to make these, but I think they are worth it.

Tools Used

Pictured above are some of the tools needed. This was the second time trying to work with these flowers, so I ended up needing more tools before finishing the project. Here is a complete list of what I used:

Size 8 Hook

Size 20 Lizbeth Yarn

Scissors

Flush Cutters

Floral Wire Gauge 22

Sewing Needle

Fabric Glue

Crocheted Flower Parts

Nylon Flat-Nosed Pliers

Tulip Symbol Pattern

Before putting the tulips together, the parts must be constructed. Below are the symbol diagrams for the leaf, stem, and fringed tulip parts. Crochet one stem and one leaf, or two, if desired. Then crochet both parts of the tulip. Start with a green color for the base of one of the petal layers. After round 3, switch from green to whatever color is desired for the tulip. The second petal layer can be crocheted all with the same color chosen for the tulip.

Tulip Stem and Leaf Symbol PatternFrilled Tulips Symbol Pattern

Below are some pictures of the process of construction. First, I took the solid-colored petal layer and put the floral wire through two different holes so that it was centered. Then I took the green petal layer and pulled the center hole over the doubled wire. After making sure the petals were positioned properly, I used flat-nosed pliers to crimp them in place. I twisted the wire as best I could for added security. At this point, I took the stem piece and slip-stitched it around the floral wire. Once I got to the end of the stem, I used the flush cutters to cleanly cut the wire. Then I sewed the leaves onto each stem and glued the ends to avoid fraying.

Tulip and Floral WireTulip How ToTwisted WireStarting Stem Time to Cut WireTulips Ready for LeavesGlue Time

This project was very enjoyable, and now I have a pretty, non-fading bouquet. The basket below is one I crocheted from a pattern I found on snowcatcher.net. That site has been my go-to for years when it comes to snowflake patterns. There are other gems like the basket as well. The wonderful lady who comes up with the patterns offers a PDF booklet for donations. There are some patterns in the booklet that are not on her site. It’s definitely worth a look.

Tulips in Basket


Beautiful Blooms in My Yard Merit Labor Involved

Last year, my husband and I decided to make our yard pretty by planting various flowers. We both really enjoy roses, so we went a little nuts and planted six plants in the front yard. These roses are special though because they are the Knock Out variety.  All Knock Out Roses bloom from early spring to the first frost in zones 5-11 with little care. While the company states the roses do not need dead-heading, I still cut off the spent blooms to encourage more. After the roses are finished blooming their first time, I will prune and fertilize them.

Rose Blooms Rose Blooms Rose Blooms Rose Blooms Rose Blooms Rose Blooms

While the roses look very nice, there are other flowers vying for attention. I planted four irises last spring, and only two survived. Luckily, the two that survived are different colors. Irises do very well if they like where they’re planted. Last year, the blue iris had only one flower while the pink had none at all. It’s amazing what a year can do! Look at all those blooms!

Blooms of Irises

My love of bulbs compelled me to plant tulips and daffodils in the fall. These early-blooming variety of tulips are gorgeous. Both daffodil varieties here are very fragrant, and their blooms last for about a week.

Tulip Blooms Tulip BloomsTulip BloomsTulip Blooms
Daffodil BloomPink TulipBlooms of Big Daffodil

There are yet more blooms in the backyard with more to come in the summer. The lilac bush was planted last spring, and it has a bit of a flourish. It will take a couple more years before it truly shines. Fragrant buds have opened from the Dianthus plants, giving off a wonderful scent. A Salvia survived the winter to produce many flower heads this spring. All these blooms encourage hummingbirds, bees, and butterflies to come into the yard.

First Lilac BloomDianthus BloomsBlooming Salvia

Even my little crape myrtle survived after enduring quite a lot. My husband surprised me one day.  He brought it home,  dug a hole, and planted it. It was doing just fine until he mowed over it. That happened just before the weather turned cold. The little plant managed to grow some leaves only to have them chewed off and be pooped on by some animal. I thought it didn’t stand a chance through the winter. This picture is proof of how hardy the crape myrtle is.

Hardy Crape Myrtle

Last, but not least, are the blooming berries. My husband and I made an above-ground planter for them last spring. We planted two thornless blackberries, two raspberries, and two blueberries. They all survived the winter fairly well except for one raspberry plant. It is very tiny compared to its companion. Time and good pruning are needed to get a bountiful crop. In another year or so, they should greatly increase fruit yield.

Blooms of BlackberriesBlooms of RaspberryBuds of Chandler Blueberry

Crochet Motifs for Spring-Inspired Purse

At the beginning of my journey of making a spring-themed, Irish crochet purse, motifs must be found. Finding the right patterns hasn’t been too trying since I have Pinterest. There are so many nice, free patterns to choose from that I decided to crochet a bunch. Later, I can decide which of these will be included on the purse. They are all so pretty that it will be difficult getting rid of any.

Crochet Motifs

Birds and flowers go hand-in-hand with spring. Bunnies are also strongly associated with the season. So these are all good candidates for my spring purse. All of these patterns are available for free. Some require knowledge of diagram crochet. There is an excellent book on the subject if you are in doubt. It is called, Complete Guide to Symbol Crochet, by Rita Weiss and Susan Lowman.

Daffodil pattern is from Ravelry. I tweaked the pattern a little by only using two colors and slip stitching in between petals for added definition.
Lily of the valley pattern is from Lion Brand Yarn.
Daisy pattern is from Mama in a Stitch.
Three of the birds are found here. They are the swans and bluebird.
Hummingbird pattern and Variation of hummingbird pattern (pastel multi-color) are crocheted using symbols.
Rabbit pattern is found on a Russian website.

Much progress has been made, and I am very happy with the way the motifs look. The ends need to be hidden and glued to ensure no raveling. More flowers are needed, as well as leaves. There will be many more motifs crocheted before I am done. It’s never wrong or bad if there are extra stored away. They can always be used on other projects or be given away as gifts.

Here are some closer pictures of the motifs:

Crochet MotifsCrochet Motifs

Crochet MotifsCrochet Motifs


My First and Second Projects in Wood Burning

Wood burning is a very fun and relaxing hobby that is easy and inexpensive to get started. All that’s needed is a wood burning tool, a piece of wood, a pattern, and a laser printer. Also, it’s always a good idea to have a scrap piece of wood nearby to test the temperature of an attachment and to work on technique.   The bird and flowery branch pattern I found was scaled to the size I needed using GIMP. An easy way to transfer a design is by using a laser printer. The ink is copied nicely onto the wood by using the transfer point attachment of Creative Versa-Tool. The lines on this particular drawing are very fine and detailed, so I had to use the tapered point attachment. After finishing the main part, I decided to add a top and bottom border using free-hand. Finally, I added some color to the border in order to make the burning stand out more.

Bird and Flower Woodburn Wood Burning of Bird and FlowersWood Burning with Added BorderFinished Wood Burning

After completing the first project, I wanted to do more. So I found a horse pattern and burned it as well. I finished the burning by rubbing mineral oil into the wood. The oil provides some protection, and it gives the wood a nice sheen.

Horse Transfer

Finished Horse Wood Burning

These are basic line drawings that are great for beginners like myself. There are very advanced wood burns that involve a lot of shading and texturing, but those are for the experts. Really skilled artists use a more expensive wood burning tool than the Versa-Tool. The advantages of that tool are complete control over temperature and more variety of attachments. For now, the burner I have will work until I learn more techniques.

Besides being a relaxing hobby, wood burning provides a way to create a unique gift for someone special. The sky’s the limit when burning. There are even some pieces that involve relief carving. One of the nicest qualities of wood burning is that it is teeming with creativity. It will be difficult to become bored with over time.

Start Seeds Indoors for Better Control and Results

It’s a cold day for outdoor gardening, so this is an opportune time for starting my seeds. A friend of mine mailed me some last year, and I am just now getting around to planting them. It should be fine though because seeds can still germinate if kept in a cool, dry place. Some of them require soaking before sowing, so not all of them will be planted today. That’s fine because the most difficult part is filling the pots with soil without spilling it all over the place.

I have quite a selection of seeds to plant. My friend gave me all but the parsley, cilantro, dill, and passion flower.

Seeds

Unfortunately, I cannot plant all of my seeds today as I had planned. Kiss me over the garden gate requires a cold hibernation before it can properly sprout. It is similar to how tulips, hyacinths, and other bulbs like to have long winters to flourish. My refrigerator will now facilitate a one-month cold hibernation for the seeds before I sow them. The passion flower seeds need a 24-hour warm soaking before planting. This allows the hard covering to soften, making it easier for the seed to germinate. Ipomoea lobata is another plant getting a slow start. The seeds require either a night’s soaking or getting nicked on the surface. I have chosen to soak them for eight hours before planting.

Seeds soaking


The Jiffy seed starter I am using seems great because there is no need to transplant. Instead, I can just pop an individual pot into the ground where I want the plant to grow. This is very nice since some plants do not like being transplanted because it shocks their roots too much. I am using seed starting potting mix so my seeds get an extra jump start.

Jiffy Seed Starter

Pots and Soil

It didn’t take very long to sow seven out of ten plants and tend to the others. My three cats pitched in to help me. Even with their “help,” it only took one hour. Over the next few weeks I will monitor the soil moisture like a hawk to make sure the seeds germinate properly. I am excited to have an herb garden this summer, and I hope to incorporate them all into some homemade dishes.

Bubbles Helping Me Sow