Delicious Roast Dinner Perfect for Cold Weather

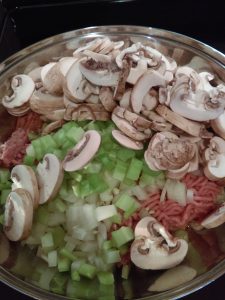
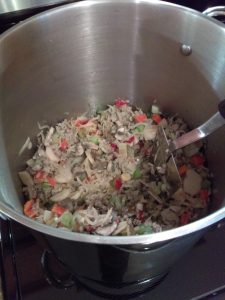
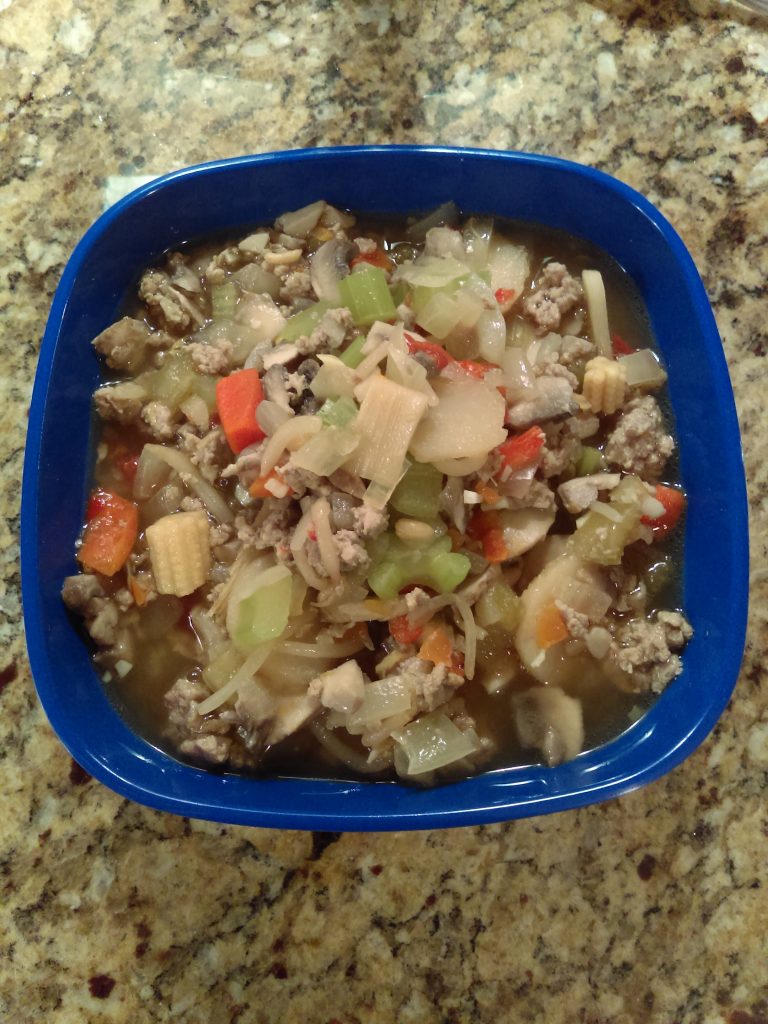
Nothing is quite as delicious as biting into a delectable, tender roast on a cold day. It’s been a tradition in my family to prepare beef roast when temperatures drop, and it’s a good one! If any meat or vegetables are leftover, I just use them for stew. My grandma taught me that. Although the cost of some roasts may seem high at first, they are actually very economical. Luckily there are several to choose from in both price and flavor. My preference is for the rump or bottom round cut because of its texture and taste.

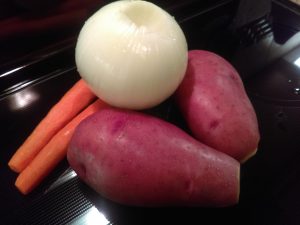
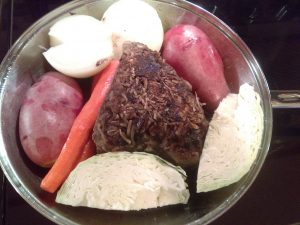
When selecting a cut to be roasted, it’s always a good idea to pick one with some fat. The fat imparts tons of flavor while cooking, and it can be taken off later after cooling or deglazing. Another important factor to look for is height of the cut. Make sure that it can fit inside a pan comfortably with the lid on tight. Vegetables for the meal can be picked on preference, but I personally enjoy carrots and onions. Potatoes are always welcome, too. This time, I added some cabbage to see what it was like. Anything that can fit will get bathed in roast flavor.

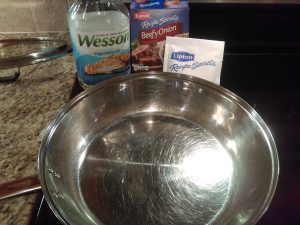
Planning ahead is a good idea for this recipe. Big hunks of meat take time to cook thoroughly, making this meal great to start in the morning to have by lunch. It also makes a great weekend dinner. I use Lipton beefy onion soup mix to add more to the meal, but any seasoning and beef-based broth are good. My family always used Lipton, so I grew accustomed to the taste. Now the soup mix contains no MSG, making it healthier than it was.

Roast Roast

Beef Roast

1-2 Tbsp. Vegetable Oil
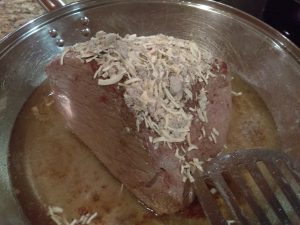
1 Lipton Beefy Onion Soup Mix Package
Roast That Fits Pan
~ 2 Cups Water or Wine
Vegetables (Carrots, Onions, Cabbage)
Potatoes
Extra Seasoning for Veggies (optional)

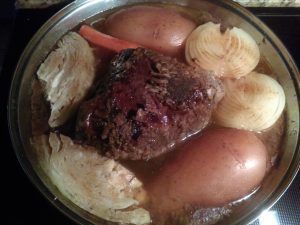
Start by putting oil in the pan and heating it. Add the meat and brown all sides as best you can. After browning, add water or wine to deglaze the pan. Pour the soup mix on top of the meat so that it is coated. Allow the liquid to come to a low boil with the lid on, then turn the temperature down so that it stays simmering. Cooking time will vary depending on the size of the cut. Typically, I cook almost a 2-pound roast for about three hours before adding vegetables. Vegetables usually take about an hour if left to simmer constantly. So, the meat will cook four hours. The best way to tell if everything is done is by checking tenderness with a fork. The meat should fall off, and the vegetables should be soft. Potatoes take longer, depending on their size. So it may be good to put them in a bit before the vegetables by about thirty minutes. Season vegetables and potatoes to taste.

Roast AdditionsRoast

Beef Roast

Oriental Turkey Soup Makes Eating Healthy Simple

Oriental turkey soup is my husband’s favorite, and it is simple to make. My mother-in-law gave me the recipe for it, and I changed it a little. Sometimes the grocery store doesn’t have items that I need in stock, so I have to improvise. Improvising creates lots of possibilities in the kitchen!

Oriental Turkey Soup

Traditionally, oriental turkey soup is served with rice. Any rice can be used, depending on personal preference. If you are staying away from carbs, riced cauliflower can be a nice substitute. I found it in the frozen vegetable section. It only takes five minutes to microwave the cauliflower, making it fast and healthy. Nori sheets can be cut up and added on top when serving. However, this soup is delicious enough to stand on its own.

Riced Cauliflower

Oriental Turkey Soup

2 Tbsp. Oil
2 lbs. Ground Turkey
1 Sweet Onion
3 Cloves Garlic
3 Stalks Celery with Leaves
8-oz. Package Fresh Mushrooms
1 Quart (32 oz.) Low Sodium Chicken Broth
1 Can, Drained or 1 1/2 Cups Bean Sprouts
1 Can, Drained or 1 1/2 Cups Oriental Vegetable Mix
1 Small Can, Drained Water Chestnuts
4 Tbsp. Low Sodium Soy Sauce
2 Tbsp. Teriyaki Sauce
1 Tbsp. Sesame Oil (optional)
Salt and Pepper to Taste

Saute the turkey, onion, garlic, celery, and mushrooms in the oil on medium heat. This can be done in a large pot for a one-dish meal, or it can be done in a skillet, making it a two-dish meal. This time, I chose a skillet because it was quicker. After the meat is thoroughly cooked, add the rest of the ingredients. Make sure to have a pot large enough to hold it all. Let the soup simmer for ten minutes, then it is done. If making rice, it’s good to plan a little ahead of time to ensure it’s ready when the soup is. Brown rice takes as long as fifty minutes to cook, and jasmine takes fifteen.

Oriental Turkey Soup

Oriental Turkey Soup

Crocheted Cat Toy with Free Pattern

A crocheted cat toy is just the ticket for happy kitties. Store-bought toys can be pricey, and they have strange manufacturing odors. By crocheting cat toys, I ingrain my scent onto the yarn. This makes the toy especially tantalizing to my cats. I have three of them: Bubbles, Saxophone, and Sprinkle. They really love playing with yarn, so I decided to come up with a  pattern.

Cat Toy Materials

Cat Toy Pattern

Crochet Legend:
sl. st. = slip stitch
ch.     = chain
sc      = single crochet
inc.   = single crochet increase (2 stitches in 1)
dec.  = single crochet decrease ( 1 stitch in 2)

Using a G-size hook,
Ch. to desired length, ch. 1 ( I did 265 ch. for reference)
Sc in base of first ch. stitch on opposite side and each ch. until the end, ch. 1
Sc on other side until the end, then sl. st.
Ch. 6 and sl. st. on the other side, ch. 1
Sc 6 in ring, ch. 1
Inc. in ring, sl. st. together and ch. 1 (12 stitches)
*Sc in next sc, then inc.* around and sl. st. together and ch. 1 (18 stitches)
*2 sc in next 2 sc, then inc.* around and sl. st. together and ch. 1 (24 stitches)
*3 sc in next 3 sc, then inc.* around and sl. st. together and ch. 1 (30 stitches)
Sc in each sc around 5 times, making sure to sl. st. and ch. 1 at the end of each row (5 rows) (150 stitches)
*3 sc in next 3 sc, then dec.* around and sl. st. together and ch. 1
*2 sc in next 2 sc, then dec.* around and sl. st. together and ch. 1
*Sc in next sc, then dec.* around and sl. st. together and ch. 1 (Stuff at This Point)
Dec. around to finish ball. The cat toy is done now, or more can be added. I added some free-style frills for extra enjoyment.

Chain 6 at EndSingle Crochets Joined for BallSecond Row IncreaseThird RowFourth RowFifth RowStart of DecreaseStuff at This Point

Free-Style Additions to Cat Toy

Before finishing off and while at the base of the ball, Ch. 18, sl. st. in 2nd ch. from hook and in each ch. down. Sl. st. in same space and in next sc. Ch. 26, dc in 3rd ch. from hook, dc 8 more in same ch. for a 10-stitch popcorn. Sc down the rest of the row and sl. st. in same space. Sl. st. in next sc and repeat the first row. Ch. 18 and make a 3 dc cluster in 3rd ch. from hook, ch. 2, 3 dc cluster in next ch. sl. st. in the rest of the chains and in the same space. Repeat row one again. Sl. st. across the diameter for extra support. Leave a long tail when finishing off so that there is extra string.
Optional: For added strength, sew the top part where the single crochets meet the ball. Keep the ball as centered as possible and the string from bunching.

Sew for Added SupportFinished Cat Toy

After finishing the cat toy, I decided to try it out with my kitties. They each smelled it and batted it. Maybe next time I could add some catnip. I’d say the cat toy was a hit though because now they take turns dragging it around the house and kicking it.

Bubbles Playing with Cat ToySprinkle Playing with Cat ToySaxophone Playing with Cat ToySprinkle Enjoying Cat ToyBubbles and Sprinkle

Crochet Cute, Summer Earrings Easily

There are quite a selection of styles concerning crocheted earrings. They can go from casual to formal with a few picots or the addition of beads. Crochet is, after all, a very versatile hobby. All it takes is a small hook and size 20 thread to get the right size. Crocheted items have always been popular since their invention. What better thing to crochet than earrings for style that will last?

Earrings

So many different ideas started popping in my head when I glanced at Pinterest, and those just concern earrings! That site has a knack for stirring creative thoughts. Most trendy pairs go for around $10. Two balls of yarn can go for under that easily, and the glue is trivial because of the use it will get. With 210 yards on each skein, that’s a lot of earrings. Plus, creating your own pair makes them that more unique and tailored to you.

Using beauty products (mascara bottle and eyeliner cap) can help to make jewelry. By wrapping yarn around the products, you create a ring that is the base for the earrings made here. No needle is necessary for connecting the two rings. Just use a slip stitch to join them. The best place to join them is where the larger circle is finished off so that all loose ends are near each other for gluing. If two colors are used, there is no need to fasten off on the larger ring. Just pretend there is a color change, making sure both rings are front-side up, then slip stitch to secure the connection.

Pattern and Pictures for Summer Earrings

Mascara Bottle Making BaseRings for Earrings

As pictured above and to the far left, those are the materials I used. A pair of pliers will be needed to open and close the fishhook earrings over the crocheted loops. Wrap the yarn around both beauty products 18 times. Then take a size 8 hook and make a slip stitch to secure the ring. Single crochet 40 stitches into the larger circle and slip stitch into the first single crochet to finish the round. For the smaller circle after wrapping, single crochet 20 times into it and slip stitch to close the round. After that, chain 3 and double crochet into the same space that was slip stitched. Connect the two using a slip stitch. Cut the yarn and glue the loose ends. The length of the joined circles is about an inch and a half.

Those ideas I mentioned earlier will find their way to DaintyKitty eventually. So, stay tuned for more in the future. Maybe I will have to try my hand at a really formal pair.

More to Come

Easy and Delicious Chili Recipe That’s Quick to Make

This recipe for chili is simple, delicious, and healthy all in one. It requires only a few, affordable ingredients to make. In the past, I made it with canned tomatoes. Unfortunately, most of my experiences with different brands have been bad. Once I had a can that looked fine on the outside, but the tomatoes were coated in black mold. So now I buy tomatoes fresh because I can see what I am purchasing and because they taste so much better.

Fresh Tomatoes for Chili

Something that makes this chili unique is bison. About a year ago, I was looking at ground meats and noticed my local store started carrying bison. It’s a delicious lean meat that is just a little bit more expensive than ground white turkey. Sometimes I prefer it to turkey because it has more flavor and is more akin to beef in taste. Personally, I cannot handle any spiciness, so there is not any added in this recipe. If heat is desired, there are spicier seasoning packets available than original. Also, jalapenos can be added to the chili during simmering or when serving for extra heat.

Chili Recipe

2 Small Onions or 1 Large
4 or 5 Cloves of Garlic
3 Large, Ripe Tomatoes
1 lb. Ground Bison (or meat of choosing)
1 Chili Original Seasoning Packet
1 Can of Pinto Beans, Drained (optional)
Seasoning Salt, Oregano, Chili Powder, Fresh Peppercorns (optional)

Take the bison out of the refrigerator and put it in a skillet before starting preparation, so that it will cook more thoroughly. After doing that, take the onion and dice it into whatever size is desirable and add it to the pan with the meat. Then take the garlic and mince it and add it to the pan as well. Now, peel and dice the tomatoes and set them aside for later. Start browning the meat and vegetables on medium heat, stirring occasionally until the meat is thoroughly cooked. After the meat is done, add the seasoning packet and stir. Then take the tomatoes and incorporate them into the mix. At this point, beans or jalapenos could be combined with the chili. I usually add a little bit more seasoning than the packet because I enjoy lots of flavor. Seasoning salt, oregano, chili powder, and freshly cracked black pepper help stretch the seasoning packet and make the chili more delicious. Plus, these are nice seasonings to have on hand.  After adding everything desired into the chili, let it simmer for at least 10 minutes before eating to allow the flavors to mingle. Serve with sour cream, Frito’s, jalapenos, cheese, or guacamole.