Original Tangle Pattern by Dainty Kitty

The other day, I was just doodling and discovered a cute tangle pattern. There isn’t another one like it, to my knowledge. If there is, it would be a coincidence. The pattern consists mostly of lines, with dots alternating on a grid. It reminds me of electricity and atoms.

Tangle Pattern: Fluffer

Fluffer Tangle

The name Fluffer came about because I think it’s fun to say. Another reason is because I think the wavy lines appear fluffy and ruffly at the same time. I just combined the two adjectives into an amusing, nonsense word.

Fluffer Tangle Shaded Option

Fluffer Tangle

As shown above, it can be shaded for a more dramatic effect. Alternately, the shading could be reversed for a different look. Also, the dots in the grid could be left unfilled. Really it is up to the artist for what the final outcome will be. I think it is an easy pattern to learn and is relaxing to draw. Fluffer will definitely be used in a future project of mine, whatever it may be.

Hand-Painted Mail Organizer to Stop Clutter Part 2

Well, I finally finished the mail organizer! Last week, I began painting it after my husband did the shop work.  Inspiration was a bit lacking at first. I had to watch a couple of videos to get me started, but I think it worked out fine in the end. This one by theartsherpa was so pretty that I had to copy it. One thing about me is that I love bright, vivid colors. So, I went for a sort of bold statement. After all, I will be seeing this every day and want it to be pleasing.

Mail Organizer Part 2Mail Organizer Part 2

After finishing the floral parts, I began painting the outside of the organizer. Since the sides are symmetrical, I thought it would be wise for me to keep it simple. When I was a kid, my grandpa got a shelf for me that had been painted in a similar style. I know he really liked it and joked that he was the artist. So, in a way, this reminds me of him.

Mail Organizer Part 2Mail Organizer Part 2

Mail Organizer Part 2

Finished Mail Organizer


Mail Organizer Part 2 Mail Organizer Part 2

Once I finished the faces, I painted the edges a cheery pink color. Then I added little flowers on the side edges in a darker pink. After painting, my husband took it in the garage and used wood glue to lock everything in place. Once the organizer is through drying, I will put it on top of my counter. Hopefully, my three cats will leave it alone once it is in use. They really enjoy sniffing, chewing, and batting at things so it will be interesting to see how they handle the new item.

Tangle Inspired by Historic Solar Eclipse

Tomorrow, a total solar eclipse will be visible in the United States for the first time since 1979. It was nearly 100 years ago that one could be witnessed across the entire contiguous U.S. So, it’s a pretty exciting event. It starts on the Oregon coast at 9:06 a.m. PDT tomorrow and will end on the South Carolina coast at 4:06 p.m. EDT. If you don’t want to leave your home or buy sun-safe goggles, NASA’s website has got you covered.

Since the eclipse is kind of a historic event, I felt inspired to create a Zentangle piece. To draw it, I used tangle designs I found at tanglepatterns.com, a ruler, and a compass. The specific patterns I used are: Footlites, 4 Fun, Ciceron, and Floatfest. The others are just doodles I drew in for fun. To me, the contrast of black and white looks very crisp and signifies light and dark naturally. So, I will most likely leave it uncolored.

Total Solar Eclipse Tangle

Solar Eclipse Tangle

This piece took longer than expected, but I did finish it in time! Technically, I know that the sun’s surface cannot be seen during a solar eclipse, but I took creative license here. I thought it would look better this way. One of the things I enjoy so much with Zentangle, is that seemingly random patterns can be taken as building blocks to construct realistic or fictitious works of art. Also, because of the nature of the medium, timidity gets overtaken by creativity. When I finished this, I could hardly believe it. Usually, I get hung up on silly things that keep me from finishing a project. With this, it’s easy to gain momentum and stick with it until the end. So, whether you like science or art or both, I hope everyone gets to enjoy the total solar eclipse tomorrow.

Hand-Painted Mail Organizer to Stop Clutter Part 1

Mail is one of those things that just builds and builds until it becomes a paper monster. Whether its spam that should be thrown out immediately or dreaded bills that have deadlines, mail must be organized. So, a mail organizer was conceived. My husband came up with a design that would work for separating bills from everything else. The divider of the organizer has a handle for easy pick-up, and the size is small enough so that it doesn’t take up too much room.

Using medium-density fibreboard (MDF), my husband cut out a nice design and the joints. After I drew hearts on the board, he cut them out using a scroll saw. Then he glued the joints together, keeping the divider out for easy painting. It’s always fun to do projects with him, especially if it helps with organization. MDF is a very absorbent material, so I had to apply a white base-coat first.

Mail Organizer Pt. 1Mail Organizer Part 1

Using acrylic paint, I applied it to all the surfaces except the bottom. In some areas it took two coats, so it was a bit time consuming. The edges of the material were the most absorbent and needed four coats to cover the board well. MDF must always get a base-coat in order for any design to show. Luckily acrylic paint dries quickly, so I was able to coat it all in one sitting.

Mail Organizer Part 1

After finishing that part, I had a little time left over for adding color. I’m still not 100% sure what I will be painting, but it will hopefully turn out well. Maybe something floral, but it will definitely be dainty. When the painting is done, the divider will be glued in the center, using a clamp to hold it in place. I look forward to finishing it and having a pretty organizer on my counter in place of clutter.

Mail Organizer Part 1


My Own Pattern Inspired by Zentangle

A few years ago, I started dabbling in Zentangle. My cousin sparked my interest by showing me her awesome work. Maria Thomas and Rick Roberts sort of fell into the art form when Maria noticed she felt better after drawing. Zentangle is a term they copyrighted to describe their method and patterns. Anyone can make up their own tangle, but one must submit it to see if it will be trademarked. It’s so much fun, that it’s hard to stop once you’ve tried. There is also a sense of calmness that comes from drawing, using their method.

My Zentangle Drawing

Above is a very humble attempt at making a tangle composition. I was in a very floral mood, as you can see. All of the patterns in it are available for free in the first link. Unfortunately, I don’t remember their names, so it will take some hunting.

After studying and trying my hand with different patterns, I came up with my own tangle. Now, I say that not knowing if there is another one out there like it. I haven’t seen all the patterns, and I’m not a certified teacher. Honestly, this came about from hours of trying to come up with something. My brain just naturally flowed into it. I became fixated with diamonds and rays. There could be many variations depending on shading or the slightest additional line. The tangle reminds me of stars and stripes, but that name might be considered too suggestive. Perhaps, Starps is a good enough tangly term.

Zentangle-Inspired Pattern

Stars and Stripes Tangle


Stars and Stripes TangleStars and Stripes Tangle

Stars and Stripes TangleStars and Stripes Tangle

Stars and Stripes Tangle

Please feel free to use my patterns in your creations. Just drop a line for me, if you would be so kind. ? Saying where the pattern comes from helps my blog and encourages me to make more things. I enjoy sharing my ideas and projects with you. ?

Rose Water Facial Mask for Aging or Sun-Damaged Skin

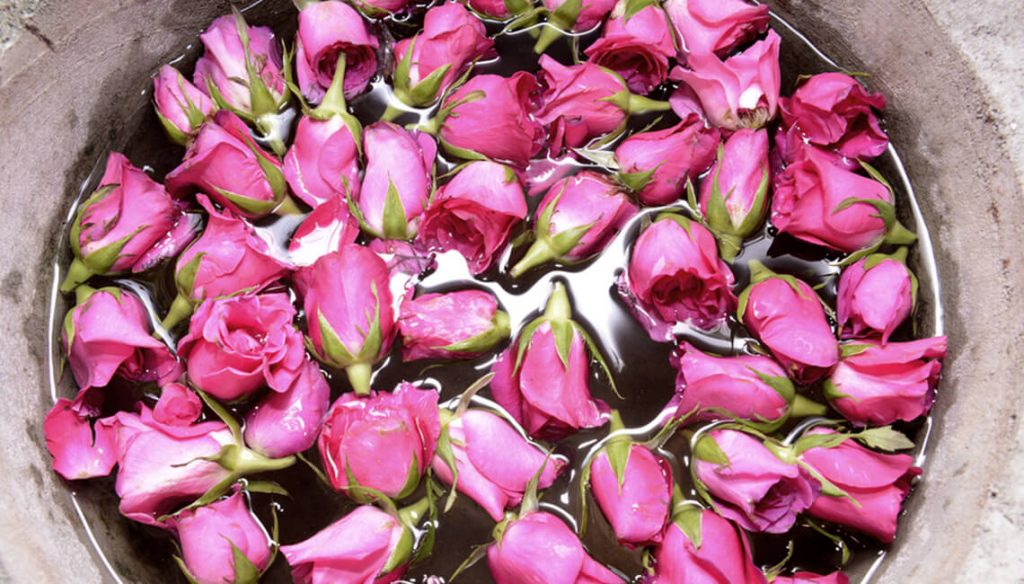
Rose water not only smells and tastes nice, but it also helps heal skin. During the 17th century, royalty considered it so valuable that it was used as currency. Today, it is still just as valuable, especially concerning skin care. It has been shown to be a highly effective moisturizer. Rose water may also reduce damage to elastin fibers in skin. This makes it great for reducing wrinkles and dullness. Needless to say, it is an important addition to any skin care regimen.

Rose Water

Rose water can be used alone as a toner or spritzed as a moisturizer. If you want more fighting power, add some other great ingredients to make a mask. I have made a chart that shows what each ingredient does, and the best part is that they go with all skin types.

Face Mask Ingredient Guide

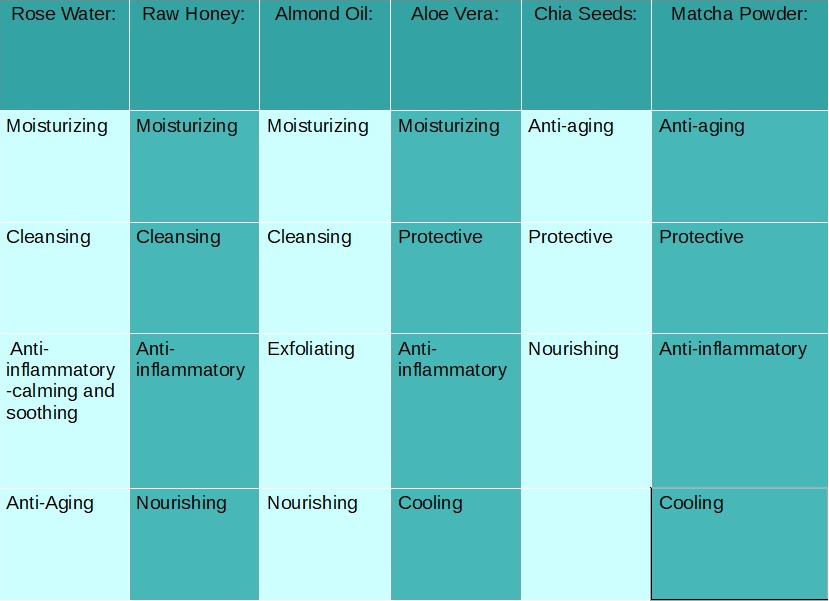
All of the natural ingredients listed above are great at what they do. One thing to keep in mind when using honey is that it should always be raw to get the full effects. I have mentioned almond oil in the past, and I have experienced how awesome it is. On top of everything it does, it seems to help even skin tone. Aloe Vera is another super ingredient, especially concerning sun burns. One that surprised me is chia seeds. They are known for being healthy to eat, but they also help skin. Really it’s a good idea to both eat them and apply them to help aging. Finally, there is matcha green tea powder, which has basically the same effects on skin as it does internally.
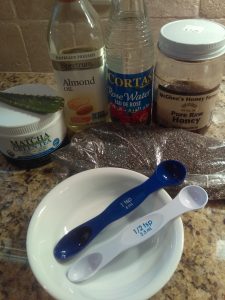
Rose Water Mask

1 tsp. Rose Water
1 tsp. Raw Honey
1/2 tsp. Almond Oil
1/2 tsp. Aloe Vera
1/4 tsp. Chia Seeds
1/4 tsp. Matcha Green Tea

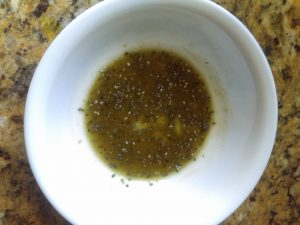
Before getting started, keep in mind that the mask mixture must soak for 30 minutes up to 2 hours. This keeps the chia seeds from absorbing your skin’s moisture and it allows their nutrients easier access to the dermis. Take a small bowl and add everything together. Mix well and let set at room temperature. Make sure that your skin is clean before applying any mask. It is best to take a warm washcloth and place it on the face for a couple of minutes to open pores for maximum absorption. After soaking, take the mask and apply it, being careful to avoid the eye area. Keep it on for about 15 minutes or until it is mostly dry. Rinse off with warm water and pat dry.

Rose Water Face Mask IngredientsRose Water Face Mask